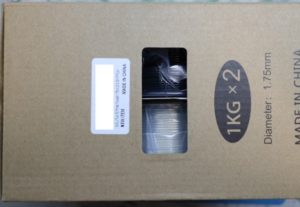
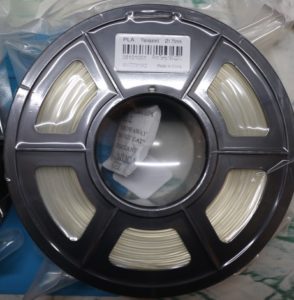
SUNLU 3DプリンタフィラメントPLA Plus
ようやくフィラメントが無くなったので
交換した。
SUNLU 3D Printer Filament PLA Plus
At last the filament is gone
Replaced.
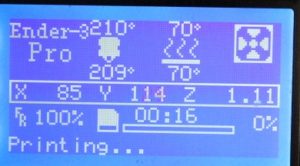
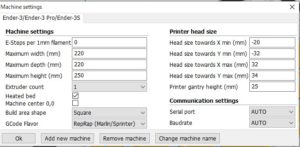
creality Slicerの設定
このスライサーは親切だ。
外販フィラメントの設定があるのでそれを選択してアドバンスにすればほぼ完了
積層は無いのでcuraまでは使用しなくても無難にできる。
basic設定
creality Slicer settings
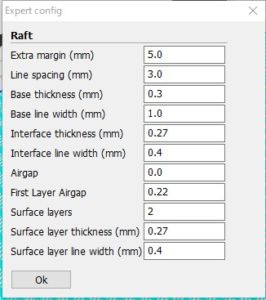
advanced設定
advanced settings
This slicer is kind.
There is a setting for external filament, so if you select it and make it advanced, it is almost completed
Since there is no lamination, it can be safely done without using cura.
basic settings
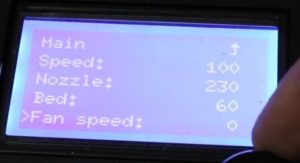
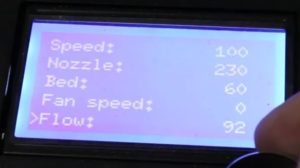
これで全く問題ない。
これは、最終的な0.3mmノズルの設定
次に
炭素繊維のフィラメンも購入したので
ノズルも交換した。
無知な自分だったので調べると真鍮製と鋼製(ステンレス)があり
まず
This is no problem at all.
This is the final 0.3mm nozzle setting
next
I also bought carbon fiber filament
The nozzle was also replaced.
I was ignorant and found that there were brass and steel (stainless)
First
2種類購入
わかったのは、通常のフィラメント
PLA、PLA+は、ノズルの温度が低く真鍮を使うのがベストだったという事でした。
やりたかったのは、全部に共通したノズルを使用したい!
炭素繊維があるので擦れによって摩耗するらしく、ステンレスが望ましいという事
なので、ステンレス製のノズル設定の温度のみ変更と考えたのがふざけた思考でした。
3つもノズルを詰まらせた、ショック。
(^^>
真鍮製ノズルは、0.4、0.3、0.2まで変更したが、失敗したのは0.2mmと初めの0.4mm
を失った。
tweezers
Purchase two types
I found out that normal filament
For PLA and PLA +, the nozzle temperature was low and it was best to use brass.
What I wanted to do is to use a common nozzle for all!
It seems to be worn by rubbing because there is carbon fiber, and stainless steel is desirable
So it was a silly thought that only the temperature of the stainless steel nozzle setting was changed.
A shock that clogged three nozzles.
(^^>
The brass nozzle was changed to 0.4, 0.3, 0.2, but failed 0.2 mm and the first 0.4 mm
Lost.
教訓
フィラメントの取り外しには、注意する。
まず用意するのは、
ピンセット
Lesson
Be careful when removing the filament.
First, prepare
ゴム手袋(冷えるとすでに取れなくなるので)
細いペンチ
まず、ノズルを温める。
ここで失敗!
実は、フィラメントの交換と言うモードがあった。
温めて多少出てから抜けばよかった。
安易に抜いてしまった。
ノズルを外して非常に熱いので急いでノズルの裏からでるフィラメントを抜き出した。
使用量は、300m 1kg分だが、真鍮とフィラメントの間が焦げているようだった。
温度が高すぎるのと、送り出しスピードが少々早いのだろう。
それを見てたら固着してしまった。
Rubber gloves (because it can no longer be removed when it cools)
Thin pliers
First, warm the nozzle.
Fail here!
Actually, there was a mode called filament exchange.
It should have come out after warming and coming out a little.
I easily pulled it out.
Since the nozzle was removed and it was very hot, the filament coming out of the back of the nozzle was quickly withdrawn.
The amount used was 300m 1kg, but the area between the brass and filament seemed to be scorched.
Perhaps the temperature is too high and the delivery speed is a little faster.
When I saw it, it stuck.
焦って、このクリーナを差し込んだが
勢いあまって折れてしまった。
ショック!
I was impatient to insert this cleaner
It broke with momentum.
shock!
その上、これについてくるピンセットは、先が貧弱でもうだめ。
別途購入のピンセットで、ノズルから2mmほど残して
フィラメントに負けました。
ステンレスは、もっと手ごわかった。
Moreover, the tweezers that come with this are so poor that they can no longer be used.
With tweezers purchased separately, leave about 2 mm from the nozzle
I lost to the filament.
Stainless steel is even more handy.
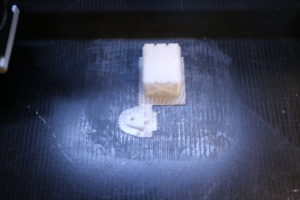
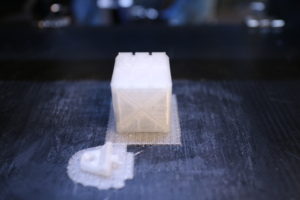
ノズル 真鍮 0.3mm

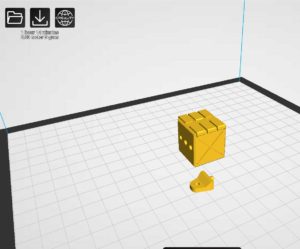
非常にきれいでした。
0.3で積層
180です。
こちらだと、スピードが倍でした。
売りれだったのが、また販売していました。
ショック!
Here, the speed was doubled.
What was sold was sold again.
shock!
定着用の糊は一切使用していません。
No glue is used for fixing.