
ラップトップや携帯電話で子育てお父さんの工作
小さな姿を見ることができるように、動き検出、温度とシンプルなWebブラウザインタフェースを持つ単純なラズベリーパイのベビーモニターを作成する方法を指南してくれてます。
As an expectant Dad, I was searching for helpful things to do in preparation for the arrival of our little one. Once I had all the essential items ready, hospital bag packed and nursery painted I set about a little hobby project. I bought one of the original Raspberry Pi’s when they first came out – a tiny, cheap low power computer. Until this point, I had been searching for a use – the baby monitor seemed like a perfect
fit. Today I will walk through how to create a simple Raspberry Pi baby monitor with motion detection, temperature and a simple web browser interface so you can watch your little one on your Laptop or phone.
What you will need for the Raspberry Pi Baby Monitor
1 Laptop (to prepare the Raspberry Pi)
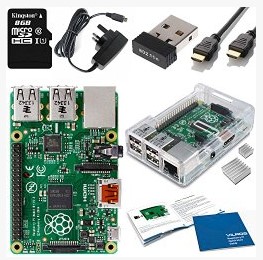
1 Raspberry Pi
1 SD Card (at least 2gb, ideally 8gb or more)
1 USB charger and micro usb cable
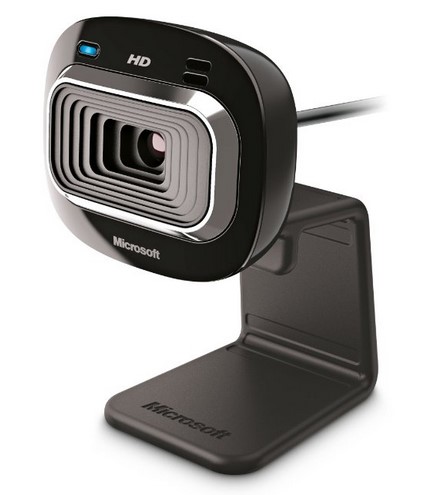
1 USB webcam
1 Ethernet cable
2 Ethernet Powerline Adapter
If you’re not sure – I’d recommend getting a complete starter kit.
daemon on
framerate 2
width 640
heigh 480
ffmpeg_video_codec mpeg4
webcam_localhost off
このように、デーモンを利用して動作させています。
簡便で良いアイデアですよね、あまり難しく必要ないので。
In this way, we have to operate using the daemon.
Its a good idea is simple, because you do not need it too difficult.
この次は、
This next,
部屋の温度を見たい
Eメールで赤ちゃんの動きを見たい
Webインターフェースの改良
Estimating the temperature in the room
E-mail notification when the baby moves
Improving the web interface
立派ですね。でも、子供のそばが一番です。
It is admirable. But, is near the children is the best.