
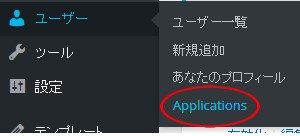
OAuth 認証のために、Wordpress に以下の plugin をインストールします。
ダウンロードして転送っす。
プラグインの検索では出てこないため、github から zip をダウンロードしてきてインストールする必要があります。
https://github.com/WP-API/OAuth1
注意書きがありますよって
If you already know how to use OAuth, here’s the lowdown:
The plugin uses OAuth 1.0a in
We use the three-legged flow
To find the REST API index, apply the API autodiscovery process
The endpoints for the OAuth process are available in the REST API index: check for $.authentication.oauth1 in the index data.
The temporary credentials (request token) endpoint is $.authentication.oauth1.request (typically /oauth1/request)
The authorization endpoint is $.authentication.oauth1.authorize (typically /oauth1/authorize)
The token exchange (access token) endpoint is $.authentication.oauth1.access (typically /oauth1/access)
Your callback URL must match the registered callback URL for the application in the scheme, authority (user/password) host, port, and path sections. (Subpaths are not allowed.)
The only signature method supported is HMAC-SHA1.
OAuth parameters are supported in the Authorization header, query (GET) parameters, or request body (POST) parameters (if encoded as application/x-www-form-urlencoded). OAuth parameters are not supported in JSON data.
インスコ後に、
Client Key と Client Secret を作成します。
Callback は必須だったので、自サーバがいいかも。
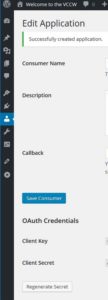
“Save Consumer” で Client Key と Client Secret が生成。
OAuth 認証
C# のクライアント側の処理になります。
Google 製の OAuthBase.cs を利用するらしいのでプロジェクトに追加。
OAuthBaseとりあえず見つけた
追加した際、System.Web を参照。
OAuth 認証は
1. リクエストトークンの取得
2. 認証
3. アクセストークンの取得
の3段階にわかれているので、順番らしい。
リクエストトークンの取得
class OAuthSample
{
    static readonly string CLIENT_KEY = "45465465465";
    static readonly string CLIENT_SECRET = "xasxsasascascsacsacascsacacsacascasc";

    static readonly string BASE_URL = "http://base/";
    static readonly string REQUEST_URL = BASE_URL + "oauth1/request";
    static readonly string AUTHORIZE_URL = BASE_URL + "oauth1/authorize";
    static readonly string ACCESS_TOKEN_URL = BASE_URL + "oauth1/access";

    public void Authentication()
    {
        var oauth = new OAuthBase();
        var nonce = oauth.GenerateNonce();
        var timestamp = oauth.GenerateTimeStamp();

        string normalizedUrl, normalizedReqParams;
        var signature = oauth.GenerateSignature(
            new Uri(REQUEST_URL),
            CLIENT_KEY,
            CLIENT_SECRET,
            null,
            null,
            "GET",
            timestamp,
            nonce,
            out normalizedUrl,
            out normalizedReqParams);

        var requestTokenUrl = normalizedUrl + "?" + normalizedReqParams + "&oauth_signature=" + signature;
        var client= new WebClient();
        var token = Encoding.ASCII.GetString(client.DownloadData(requestTokenUrl ));
    }
}
CLIENT_KEY と CLIENT_SECRET から signature を計算し、必要なパラメータとともにリクエストトークンのエンドポイントへ。
パラメータ文字列も OAuthBase.cs 内で勝手に作ってくれます。
得られた token がリクエストトークンで以下のような文字列になり。
oauth_token=54545454545&oauth_token_secret=132131313132&oauth_callback_confirmed=true
と帰ってくるとOKみたいね。
認証
得られた oauth_token と oauth_token_secret を使って認証をします。
class OAuthSample
{
static readonly string BASE_URL = “http://base/”;
static readonly string AUTHORIZE_URL = BASE_URL + “oauth1/authorize”;
public void Authentication()
{
…
var auth_url = AUTHORIZE_URL +
“?oauth_token=” + tokenParam[“oauth_token”] +
“&oauth_token_secret=” + tokenParam[“oauth_token_secret”];
System.Diagnostics.Process.Start(auth_url);
}
}
oauth_token と oauth_token_secret から作成した URL にブラウザでアクセスします。
すると以下のような画面にが出てくるので “Authorize” を押します。
なるほど、ちょっと便利でまだ実装する前に、色々外部からの調整してだな。